ATM Strategies in NinjaTrader 8: Brackets, OCO and Never Holding a Naked Position
What NinjaTrader's ATM Strategy does the instant your entry fills, the fields worth understanding before you save a template, how auto breakeven and auto trail change the trade, how to build one in Chart Trader, and which parts keep working if the platform goes down.
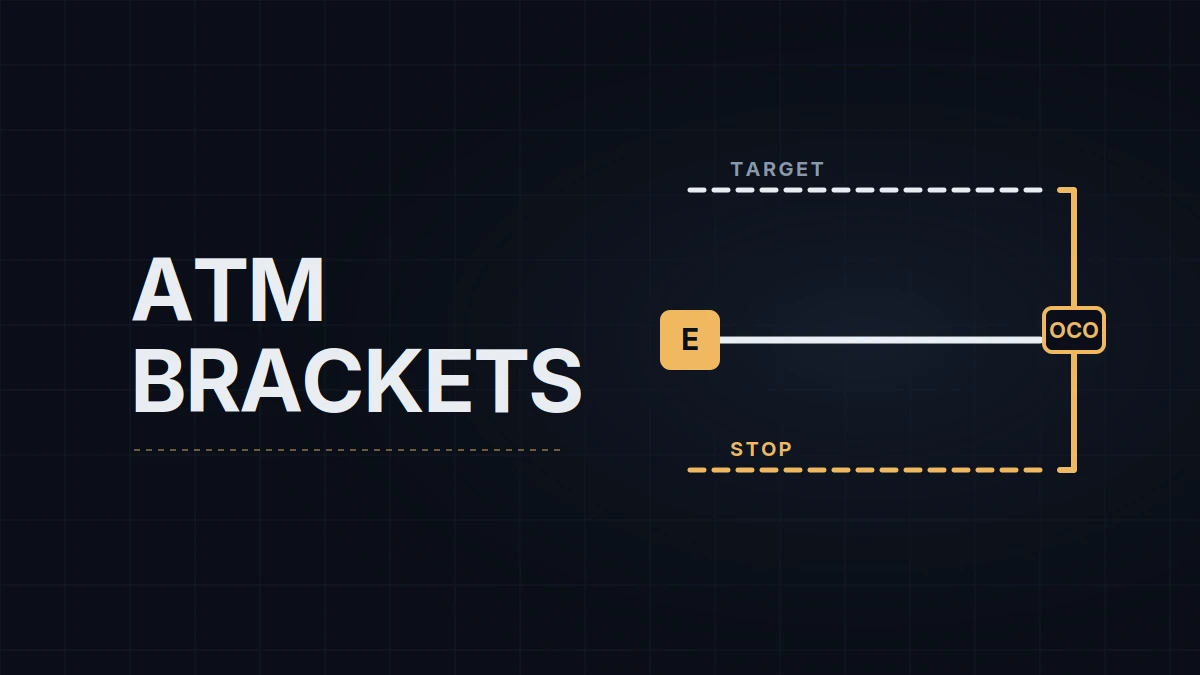
An ATM Strategy is NinjaTrader's name for a set of exit orders that attach themselves to an entry the instant it fills: a stop-loss, a profit target, and optionally rules that move the stop as the trade develops. "ATM" stands for Advanced Trade Management; in practice it means you never hold a naked position, a filled entry with no working stop behind it. On a prop account, where the drawdown rather than your balance decides how long you keep trading, that unprotected window is the most expensive thing you can own, and the ATM is how NinjaTrader closes it. This post assumes the chart is already set up; the NinjaTrader 8 chart setup covers that side.
What happens when the entry fills
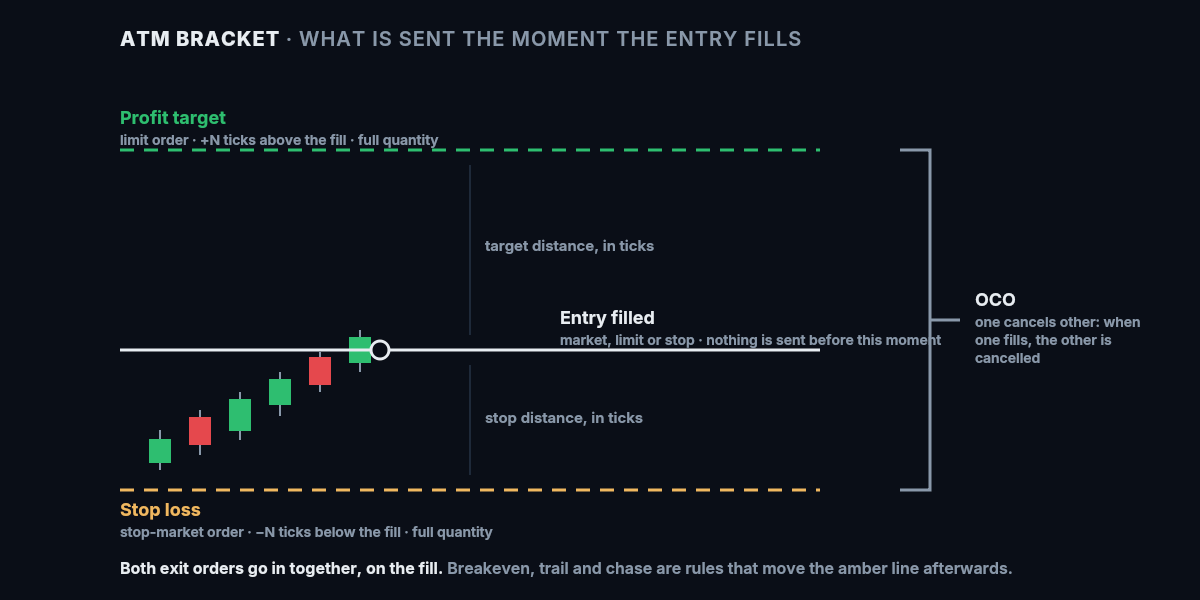
You submit an entry (market, limit or stop) with an ATM selected. Nothing else happens until it fills. On the fill, NinjaTrader submits two orders at once: a stop-market order below a long (above a short) at the distance you set, and a limit order at the target distance, each for the full position. The pair is linked as OCO, one-cancels-other: when the target fills, the stop is cancelled, and when the stop fills, the target is cancelled. Without the link you'd be left with a working order that opens a new position the next time price reaches it.
An ATM can carry more than one target. Two targets with different quantities split the position (say two contracts out at the first target, one at the second), each with its own stop, and that is the mechanism behind every "scale out" plan on the platform. The other order types on the chart, and when each one fails, are covered in order types explained.
The fields that matter
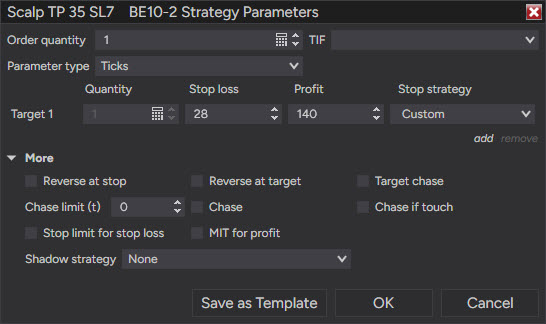
The ATM parameters live in Chart Trader (and identically in the SuperDOM and Basic Entry). Six of them do the work; the rest are edge cases.
| Field | What it sets | Where it goes wrong |
|---|---|---|
| Stop loss | distance from the fill, in ticks | typing points: a 40-point stop on NQ is 160 ticks, not 40 |
| Profit target | distance from the fill, in ticks | same unit; 0 means no target, and the stop still goes in |
| Quantity | contracts per bracket | must match the entry size, or a target for two contracts sits behind a one-contract position |
| Stop strategy | None, Auto Breakeven, Auto Trail, Auto Chase, Volume Trigger, or a saved custom combination | leaving a trailing rule from last week's template on a trade that needs a static stop |
| Entry handling | one target per entry, or one target for all entries | scaling in with "per entry" creates a separate bracket per fill, which is usually not what you meant |
| Reverse at stop / at target | flips the position when the exit fills | on by accident, this doubles your exposure in the wrong direction |
Ticks are the default unit in an ATM; the Parameter type field can switch a template to points or currency, but every template starts in ticks and most stay there. On NQ and MNQ one tick is 0.25 index points, so multiply points by four; the tick and point values post has the dollar side. A template is only a set of default numbers: <Custom> in the ATM dropdown lets you type the stop and target for this trade, and they are read at the moment you click the entry button, not after.
Stop strategies: breakeven, trail, chase
The stop strategy is the part of the ATM that keeps working after the fill. Four are built in, and they combine.
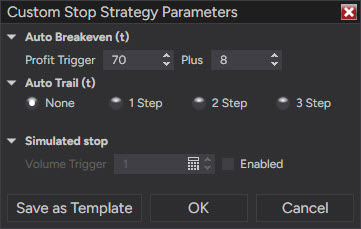
Auto Breakeven moves the stop to the entry price (plus an offset you choose) once the trade is a set number of ticks in profit. Two fields: the profit trigger and the plus. Set the trigger too close and a normal pullback takes you out at zero on a trade that would have worked; set it far and the rule rarely fires.
Auto Trail moves the stop up behind price in steps: when profit reaches a trigger, the stop moves to a new distance, and you can stack several steps (at 20 ticks trail by 30, at 60 trail by 20, and so on). The frequency field decides how many ticks price has to move before the stop is adjusted again. A trail is a decision to give back a fixed amount at the top of every move in exchange for never having to decide to exit.
Auto Chase applies to the target, not the stop: if price reaches the target and the limit order doesn't fill, the platform moves the limit toward the market by a set number of ticks. Useful on thin markets, rarely needed on NQ.
Volume Trigger adjusts the stop when a volume condition is met on the bid or ask. It exists; almost nobody uses it on index futures.
Where practitioners split is on whether any of these should be automatic. One camp runs breakeven and trail on every trade, because the rules remove the moment of decision. The other runs a static stop and target and moves them by hand when the structure says so, because a pullback against a good entry is routine noise and a rule can't tell noise from a failed level. Both work; they pay in different places.
Building one in Chart Trader
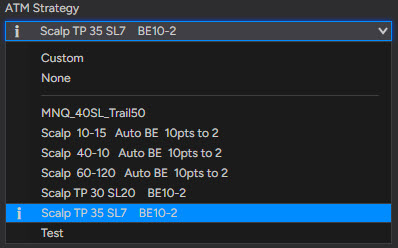
Open Chart Trader from the chart's right-click menu. Set the fields above with the ATM dropdown on <Custom>, then open that dropdown again and choose Save as template, give it a name that says what it is (NQ-static-1x beats my atm), and it appears in the list for every window on the platform. From then on you select the template, set the quantity, and use the Buy or Sell buttons; the entry goes in, the bracket follows the fill.
The thing to check every session is the dropdown. <None> submits the entry with nothing behind it, which is exactly the naked position the tool exists to prevent, and NinjaTrader will let you do it without a warning. What the dropdown shows after an entry is set per order window, in its Properties (right-click) under ATM Strategy Selection Mode: Keep Selected ATM Strategy Template on Order Submission leaves your template selected for the next entry, while the default selects the new active strategy instead. The help guide lists no setting for what a brand-new window starts with, so check the dropdown on every fresh chart.
After the fill you can drag the stop and target lines on the chart, and the platform modifies the working orders as you drop them. The Close button flattens the position and cancels the bracket in one click; Cancel removes the orders and leaves the position, which is the button to be careful with.
OCO beyond the bracket
The same one-cancels-other link that ties the stop to the target can tie two entries together. A breakout trader can rest a buy stop above a range and a sell stop below it as an OCO pair: whichever fills cancels the other, and the ATM attaches to the one that filled. NinjaTrader supports this from the SuperDOM and Basic Entry; the mechanics are in the video below.
What survives a disconnect
This is the question to answer before trusting any of it with real money. Once the entry fills, the stop and target are working orders at your connection, on the broker's side; if NinjaTrader crashes or your internet drops, the stop is still there. What lives on your machine is the logic: every automatic adjustment (breakeven, trail, chase) stops the moment NinjaTrader stops, and the OCO link is managed by the platform on most connections, which means a target that fills while you're disconnected may leave the stop working. When the platform reconnects it resynchronizes with the account, and the first thing to look at is the Orders tab, not the chart.
For the same reason, an ATM is the piece a trade copier has to understand. A copier that mirrors only the entry leaves the follower accounts naked; one that mirrors the bracket as its own OCO pair on each account, and follows your stop when you drag it, is doing the job. That distinction is the whole design brief of the copier on the tools page.
I run every entry through an ATM with the stop typed for that trade before the order goes in, because the stop belongs to the setup and not to a template; it is usually 7 to 15 points, depending on ATR. The target goes in at 35 points or more. On a range day it usually stays there as a fixed target; when a move has momentum the trailing stop takes over before price reaches it, and on trend days I try to hold longer. Of the two camps above, I'm mostly in the automatic one: once the entry fills, the stop, the target and the trail are the platform's job.
Educational content, not investment advice. Futures trading involves substantial risk of loss. Examples are for illustration only. Read the full Risk Disclosure.